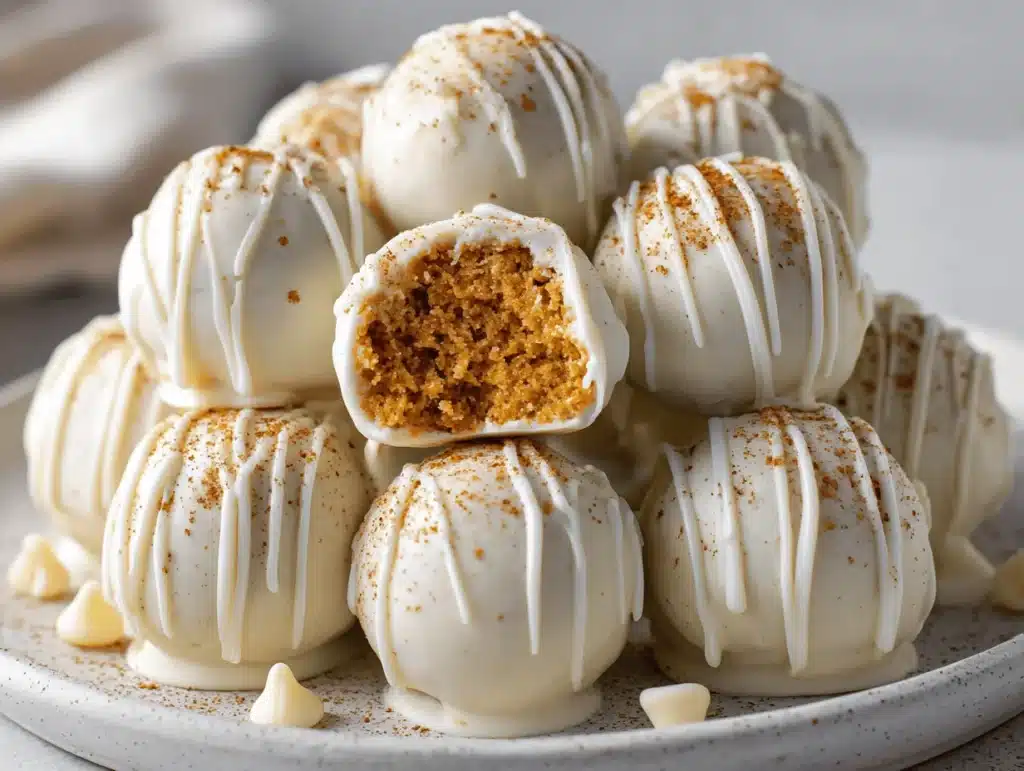
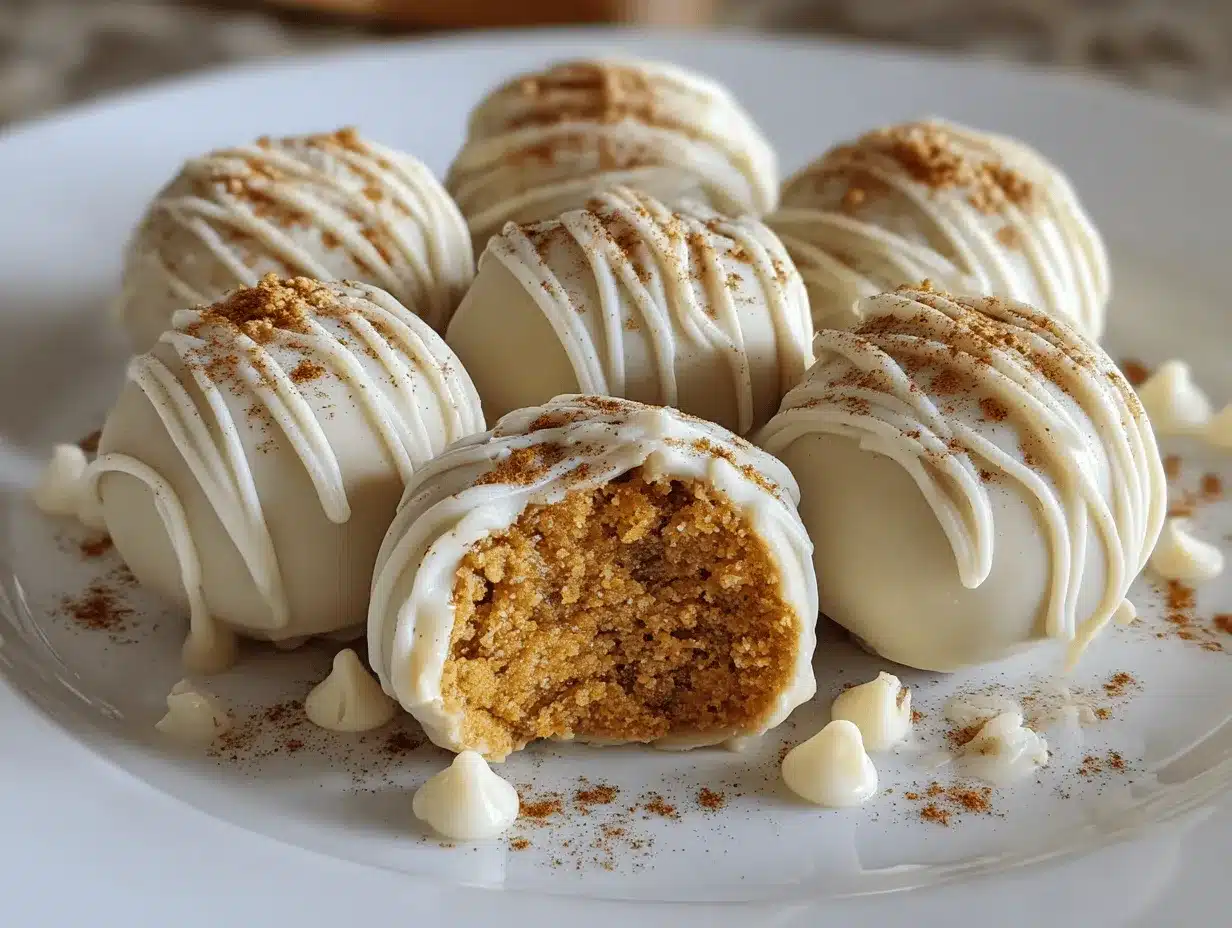
The first time I made no bake pumpkin balls, the kitchen filled with the scent of cinnamon and nutmeg—it smelled exactly like Thanksgiving morning at my grandma’s house. I’m not kidding: these little bites took me right back! There’s something magical about mixing pumpkin puree with cozy spices and rolling it into the softest, most snackable treats. You know, sometimes you just want dessert without firing up the oven or fussing with complicated steps. That’s why this no bake pumpkin balls recipe is my go-to (especially when the holiday rush hits and I’m juggling a dozen things at once).
I stumbled on a version of these pumpkin balls during a potluck swap, and—honestly—I was hooked after one bite. They’re sweet, chewy, and have that classic pumpkin pie flavor but with way less effort. Plus, you only need five ingredients (really!) and about 15 minutes to whip up a batch. They’re perfect for Thanksgiving, Friendsgiving, fall parties, or just when you’re craving something seasonal and sweet. Even picky eaters and folks who “don’t like pumpkin” ask for seconds. If you’re all about quick wins and festive flavors, these pumpkin balls are about to be your new favorite treat. Trust me, they disappear fast!
As someone who’s tested dozens of pumpkin recipes, I can promise these are foolproof and family-approved. I’ve made them with regular oats, gluten-free oats, protein powder—you name it. So, if you need something festive, easy, and guaranteed to wow your guests, keep reading. Let’s dive into this irresistible no bake pumpkin balls recipe that’s sure to become your signature Thanksgiving treat!
Why You’ll Love This Recipe
- Quick & Easy: You can make a whole batch in under 15 minutes—no oven, no complicated steps, no waiting around for dough to chill. Perfect for busy holiday schedules!
- Simple Ingredients: Just five pantry staples. No crazy store runs required. You probably have everything you need right now.
- Perfect for Thanksgiving: These no bake pumpkin balls are festive, portable, and ideal for sharing at family gatherings, potlucks, or as a sweet snack while you prep the big meal.
- Crowd-Pleaser: They’re naturally gluten-free (if you use GF oats), and I’ve seen both kids and grown-ups devour them at parties. They’re bite-sized, so everyone can grab one—or five!
- Unbelievably Delicious: Soft, chewy, pumpkin-packed, and just sweet enough. The spices hit all the right notes, and the texture is pure comfort.
After years of tweaking pumpkin recipes, I can tell you that blending the pumpkin with oats and nut butter gives these treats a rich, satisfying bite that’s miles above basic cookie dough balls. The no bake method means you get that fresh-from-the-mixing-bowl flavor without any stress.
What really sets this recipe apart is how easily it fits into any diet or occasion. I’ve made these with almond butter instead of peanut butter, swapped maple syrup for honey, and rolled them in coconut for a fancy twist. They hold up beautifully in lunchboxes, look adorable on a fall dessert tray, and—let’s face it—they’re way less messy than a slice of pie.
And if you’ve ever wished you could have pumpkin pie flavor on the go, these pumpkin balls are your answer. They’re the kind of treat that makes people ask for the recipe. So whether you’re a seasoned baker or just starting out, you’ll love how simple, tasty, and fun these sweet Thanksgiving treats turn out.
Ingredients Needed
This no bake pumpkin balls recipe keeps things simple but delicious, with just five main ingredients. Each one plays its part in creating perfect flavor and texture. Here’s what you’ll need:
- Pumpkin puree (not pumpkin pie filling) – 1/2 cup (120g)
Pure, unsweetened pumpkin gives these balls their signature color and flavor. Look for canned pumpkin with no additives, or use homemade puree if you’re feeling fancy. - Old-fashioned rolled oats – 1 cup (100g)
These provide structure and chewiness. You can swap for quick oats in a pinch, but I find rolled oats give the best bite. Use gluten-free oats if you need to keep things allergy-friendly. - Nut butter (peanut, almond, or sunflower seed) – 1/3 cup (80g)
This adds creaminess and helps bind everything together. I usually reach for creamy peanut butter, but almond butter works beautifully for a milder flavor. Sunflower seed butter is great for nut-free diets. - Maple syrup or honey – 1/4 cup (60ml)
Sweetens the mixture and adds a lovely depth. Maple syrup gives a classic fall vibe, but honey is delicious too. If you’re vegan, stick with pure maple syrup. - Pumpkin pie spice – 1 tablespoon (8g)
This blend of cinnamon, nutmeg, ginger, and cloves brings all the cozy holiday flavor. You can mix your own if you don’t have a jar handy (try 2 tsp cinnamon, 1/2 tsp nutmeg, 1/4 tsp ginger, 1/4 tsp cloves).
Optional add-ins and toppings:
- Mini chocolate chips (add 1/4 cup for a little extra sweetness!)
- Shredded coconut (roll the balls for a snowy effect)
- Chopped pecans or walnuts (for crunch and flavor)
- Pinch of salt (heightens all the flavors—don’t skip if your nut butter is unsalted!)
Ingredient Notes: I love Libby’s pumpkin puree for consistency, but any reputable brand works. For nut butter, make sure it’s well-stirred; oily separation can make the mixture tricky to roll. If your pumpkin pie spice is a little old, use a bit extra for bold flavor. You can swap oats for quick-cooking or pulse them in a food processor for a smoother texture. And if allergies are a concern, sunflower seed butter is a safe swap.
Honestly, the best part is that you can play with the mix-ins—add chocolate, coconut, or nuts for your own spin. Just keep the base recipe simple and you’ll have sweet Thanksgiving treats ready in no time!
Equipment Needed
- Mixing bowl: Any medium-sized bowl works. If you’re doubling the recipe, use a large bowl for easier stirring.
- Wooden spoon or sturdy spatula: You’ll need something strong to mix the thick pumpkin-oat blend. I prefer silicone spatulas—they scrape the bowl clean.
- Measuring cups and spoons: Accurate measurements matter for no bake recipes, especially with sticky ingredients like nut butter and syrup. I use stainless steel sets for durability.
- Baking sheet or plate: For chilling and setting the pumpkin balls. If you want to roll them in toppings, a rimmed baking sheet keeps things tidy.
- Wax paper or parchment paper: Makes cleanup a breeze and stops the balls from sticking as they chill.
- Small cookie scoop or tablespoon: Helps portion the mixture evenly. A cookie scoop gives uniform, pretty pumpkin balls.
If you don’t have a cookie scoop, just use a regular spoon and roll the mixture by hand. For mixing, a hand mixer is overkill—trust me, a spoon or spatula is plenty. When I first tried making these, I used a regular dinner spoon and they came out just fine!
Budget tip: Dollar store spatulas and measuring cups work great for recipes like this. Just wash them well and they’ll last through plenty of pumpkin seasons. For specialty tools, store them dry and avoid dishwasher heat if you want your spatulas to stay flexible.
Preparation Method
- Prep your workspace: Line a baking sheet or large plate with parchment or wax paper. This prevents sticking and makes cleanup faster.
- Mix the wet ingredients: In a medium bowl, add 1/2 cup (120g) pumpkin puree and 1/3 cup (80g) nut butter. Stir until smooth—no lumps! If your nut butter is stiff, microwave it for 10 seconds first.
- Add sweetener and spice: Pour in 1/4 cup (60ml) maple syrup or honey and 1 tablespoon (8g) pumpkin pie spice. Mix well. The mixture should smell warm and spicy—if you love bold flavors, add an extra pinch of cinnamon.
- Stir in the oats: Add 1 cup (100g) rolled oats. Use a sturdy spoon to combine everything. The dough should be thick and slightly sticky. If it’s too wet, add 1–2 tablespoons extra oats; if too dry, drizzle a bit more syrup.
- Add optional mix-ins: Fold in 1/4 cup mini chocolate chips, chopped nuts, or coconut if you like. This step is totally customizable!
- Shape the balls: Scoop out tablespoon-sized portions (about 20g each) and roll into balls between your palms. If sticking, lightly dampen your hands or chill the mixture for 10 minutes.
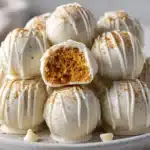
- Coat, if desired: Roll balls in shredded coconut, crushed pecans, or cocoa powder for extra flair. Place each finished ball on the prepared baking sheet.
- Chill to set: Refrigerate for at least 30 minutes. This helps the pumpkin balls firm up and makes them easier to eat. (They’re ready to eat right away, but chilling improves texture!)
- Serve and enjoy: Arrange on a festive platter. They’re best served cold or at room temperature.
Prep tip: If your dough feels too sticky, add a sprinkle of oats. Too dry? An extra teaspoon of pumpkin or syrup helps. If you accidentally add too much spice, rolling the balls in coconut mellows the flavor. The mixture should smell fragrant and look orange—if it’s dull, add a dash more pumpkin pie spice.
Troubleshooting: One time my batch was super sticky (must’ve been extra-wet pumpkin puree), so I simply stirred in a handful more oats and voilà—problem solved. Don’t be afraid to adjust. These no bake pumpkin balls are forgiving!
Cooking Tips & Techniques
Let’s face it, not every kitchen adventure goes perfectly. Here’s what I’ve learned after making these no bake pumpkin balls more times than I can count:
- Use thick pumpkin puree: Some canned brands are watery. If yours is thin, drain it using a cheesecloth or paper towel for 10 minutes. This keeps your pumpkin balls firm, not mushy.
- Chill before rolling: If your mixture is sticky, pop the bowl in the fridge for 10–15 minutes. Cooler dough is easier to shape and less likely to stick to your hands.
- Don’t overmix: Once the oats are in, mix just until combined. Overmixing makes the balls dense, not chewy.
- Customize the size: For party platters, make smaller balls (teaspoon-sized) so guests can grab a few. For snacks, go bigger—think golf ball size!
- Multitask while chilling: Use the chill time to clean up or prep toppings. That way, everything’s ready when the balls set.
- Store properly: These treats keep best in a sealed container in the fridge. If you leave them out too long, they soften up but still taste great.
I’ve had batches fall apart because I skimped on nut butter, so always measure carefully. And if you’re making them for kids, mini chocolate chips are a big hit. The key is not to rush—take your time mixing and shaping, and the result is always worth it.
Consistency matters: I like to use a cookie scoop for uniform pumpkin balls, but hand-rolling works if you don’t mind a few “rustic” shapes. If you want extra flavor, try toasting the oats lightly before mixing—just 3 minutes in a dry pan. It adds a nutty note that’s so good!
Variations & Adaptations
One of my favorite things about this no bake pumpkin balls recipe is how easy it is to switch things up. Here’s how you can make it your own:
- Gluten-Free: Use certified gluten-free oats and double-check your nut butter label. I make these for my gluten-sensitive friends all the time and they’re always a hit!
- Vegan: Stick with maple syrup instead of honey, and use sunflower seed butter if you’re avoiding nuts. All the flavor, none of the animal products.
- Chocolate Pumpkin Balls: Add 2 tablespoons (15g) cocoa powder to the mix and roll the balls in mini chocolate chips. It’s like pumpkin pie fudge—seriously addictive!
- Nut-Free: Sub in sunflower seed butter or soy nut butter for school-safe treats.
- Protein Pumpkin Balls: Add a scoop of vanilla or cinnamon protein powder and a splash more syrup to balance dryness. Perfect for post-workout snacks.
- Seasonal twist: Mix in dried cranberries or chopped apples for a fruity pop, or roll in crushed gingersnaps for extra spice.
For a personal spin, I once made these with cinnamon almond butter and rolled them in toasted coconut—my kids loved them! If you prefer less sweetness, halve the syrup and add a pinch of salt. And if you’re serving a crowd, double the batch and make a rainbow platter with different coatings.
Serving & Storage Suggestions
These no bake pumpkin balls are best served chilled—straight from the fridge or after 10 minutes at room temperature. They look adorable stacked on a rustic wooden platter or arranged on a fall-themed plate for Thanksgiving.
I love pairing them with a cup of spiced chai or apple cider. If you’re hosting brunch, set out a bowl alongside yogurt and granola. They also make great edible gifts—just pop a few pumpkin balls in a festive tin or jar and tie with a ribbon.
For storing, place pumpkin balls in an airtight container lined with parchment paper. Refrigerate for up to 5 days. They also freeze well—just layer between sheets of wax paper and freeze for up to 2 months. Thaw on the counter for 20 minutes before serving.
To reheat (if you want them slightly warm), microwave for 5 seconds—just don’t overdo it or they’ll get mushy. The flavors deepen after a day in the fridge, so they’re even tastier as leftovers. I sometimes make a double batch and freeze half for last-minute snacks.
Nutritional Information & Benefits
Each no bake pumpkin ball (about 20g) packs roughly:
- Calories: 70
- Protein: 2g
- Fat: 3g
- Carbohydrates: 9g
- Fiber: 1g
- Sugar: 4g (from maple syrup or honey)
Pumpkin is a powerhouse ingredient—rich in vitamin A, fiber, and antioxidants. Oats offer sustained energy and heart-healthy benefits. Nut butter adds protein and healthy fats, which make these pumpkin balls satisfying and kid-friendly.
This recipe is naturally gluten-free (if using GF oats), dairy-free, and can be vegan. Watch for nut allergies—swap in sunflower seed butter if needed. Honestly, I love having a treat that’s both wholesome and festive. It’s the little things that make holiday eating fun and feel-good!
Conclusion
If you’re looking for a sweet Thanksgiving treat that’s easy, adorable, and bursting with pumpkin spice, this no bake pumpkin balls recipe will be your new go-to. You get all the flavors of pumpkin pie in a bite-sized, fuss-free snack—no oven, no stress, just pure autumn joy.
Feel free to tweak the recipe to match your tastes or dietary needs. Add chocolate, roll in coconut, swap nut butters—make it your own! Honestly, these pumpkin balls have become a family tradition and a party favorite in my house.
So, what do you think? Try out this recipe, snap a photo, and let me know your favorite variation in the comments below! Share with friends, pin for later, and make these pumpkin balls part of your fall celebrations. Here’s to easy recipes and sweet memories—happy Thanksgiving!
FAQs
Can I use fresh pumpkin instead of canned pumpkin puree?
Yes! Just make sure to cook and mash it well, then drain any excess liquid. The consistency should match canned puree—thick, not watery.
How long do no bake pumpkin balls last in the fridge?
They’ll stay fresh for up to 5 days in an airtight container. If they soften, just chill them a bit longer before serving.
Can I freeze these pumpkin balls?
Definitely. Freeze in layers between parchment paper for up to 2 months. Thaw at room temperature before eating.
Can I make these pumpkin balls nut-free?
Absolutely. Use sunflower seed butter or soy nut butter instead of peanut or almond butter. The texture will be just as good!
What can I do if my mixture is too sticky or too dry?
If it’s sticky, add more oats a tablespoon at a time. If it’s dry, stir in a teaspoon of syrup or pumpkin puree. It’s all about getting the dough just right—don’t worry, a little adjusting is normal!
Pin This Recipe!
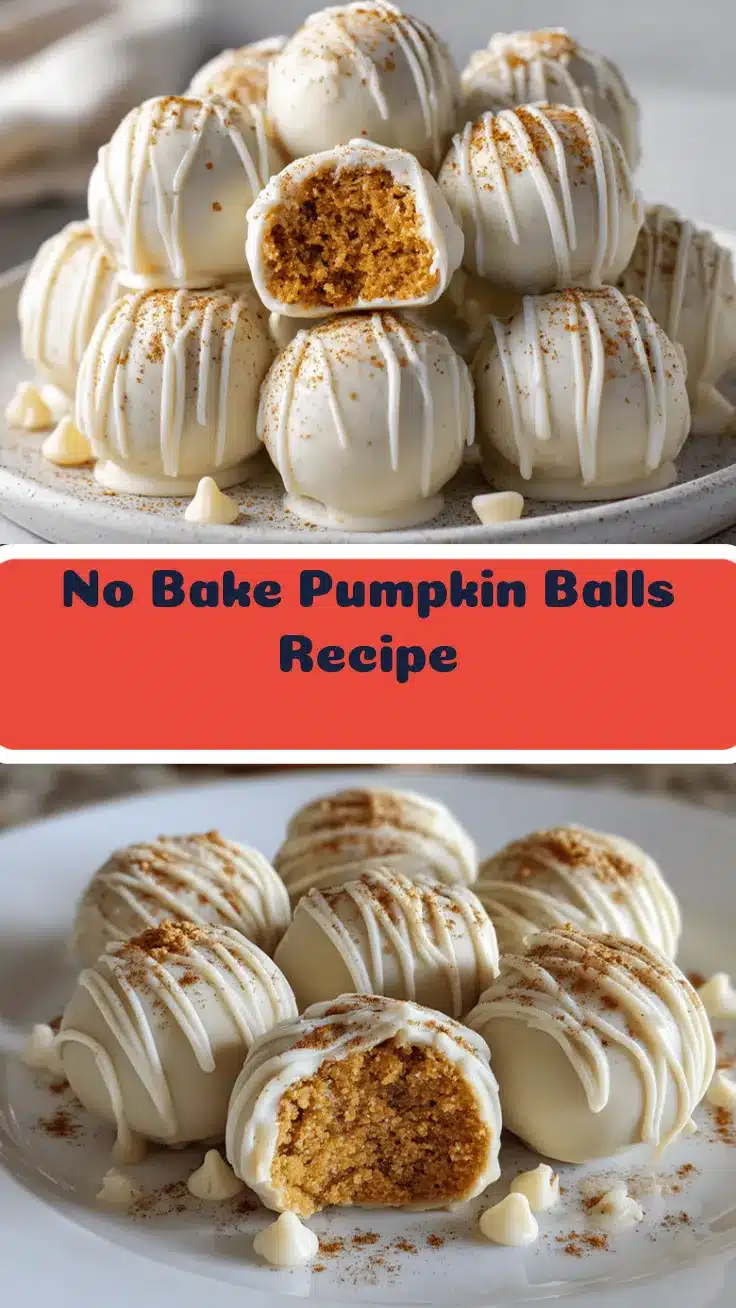
No Bake Pumpkin Balls Recipe: Easy 5-Ingredient Thanksgiving Treat
- Total Time: 45 minutes
- Yield: 12-16 balls (about 12-16 servings) 1x
Description
These no bake pumpkin balls are a quick, festive, and delicious treat packed with pumpkin pie flavor. Made with just five simple ingredients, they’re perfect for Thanksgiving, fall parties, or anytime you crave a seasonal snack without turning on the oven.
Ingredients
- 1/2 cup (120g) pumpkin puree (not pumpkin pie filling)
- 1 cup (100g) old-fashioned rolled oats (use gluten-free oats if needed)
- 1/3 cup (80g) nut butter (peanut, almond, or sunflower seed)
- 1/4 cup (60ml) maple syrup or honey
- 1 tablespoon (8g) pumpkin pie spice (or 2 tsp cinnamon, 1/2 tsp nutmeg, 1/4 tsp ginger, 1/4 tsp cloves)
- Optional: 1/4 cup mini chocolate chips
- Optional: Shredded coconut (for rolling)
- Optional: Chopped pecans or walnuts
- Optional: Pinch of salt (if nut butter is unsalted)
Instructions
- Line a baking sheet or large plate with parchment or wax paper.
- In a medium bowl, add pumpkin puree and nut butter. Stir until smooth.
- Pour in maple syrup or honey and pumpkin pie spice. Mix well.
- Add rolled oats and stir until combined. If the mixture is too wet, add 1–2 tablespoons extra oats; if too dry, drizzle a bit more syrup.
- Fold in optional mix-ins like mini chocolate chips, chopped nuts, or coconut.
- Scoop out tablespoon-sized portions and roll into balls between your palms. If sticking, lightly dampen your hands or chill the mixture for 10 minutes.
- Roll balls in shredded coconut, crushed pecans, or cocoa powder if desired. Place each finished ball on the prepared baking sheet.
- Refrigerate for at least 30 minutes to set.
- Serve chilled or at room temperature.
Notes
Use thick pumpkin puree for best texture. If mixture is sticky, chill before rolling or add more oats. Customize with chocolate chips, coconut, or nuts. Store in an airtight container in the fridge for up to 5 days or freeze for up to 2 months. For nut-free, use sunflower seed butter. For vegan, use maple syrup.
- Prep Time: 15 minutes
- Cook Time: 0 minutes
- Category: Dessert
- Cuisine: American
Nutrition
- Serving Size: 1 ball (about 20g)
- Calories: 70
- Sugar: 4
- Sodium: 20
- Fat: 3
- Saturated Fat: 0.5
- Carbohydrates: 9
- Fiber: 1
- Protein: 2
Keywords: no bake, pumpkin balls, Thanksgiving treat, easy dessert, gluten-free, vegan, fall snack, pumpkin pie flavor, healthy snack, kid-friendly