The first time I made these Easy Apple Pie Bars, the aroma of cinnamon and baked apples instantly filled my kitchen—honestly, it smelled like autumn itself had moved in for the afternoon. I wish I could bottle that scent! These dessert squares are my go-to treat every time the weather turns crisp and apples start piling up at the market. You know, I’ve always loved classic apple pie, but let’s face it—sometimes you just want something simpler and quicker without sacrificing any of that nostalgic, cozy flavor.
Apple pie bars are the answer for busy bakers who crave homemade goodness but don’t want to fuss with rolling out pie dough. When my kids come running in after school, nothing beats handing them a warm square fresh from the oven (and yes, they always ask for seconds). The recipe actually came about one rainy day when I had more apples than patience, so I threw together a buttery crust, a spiced apple filling, and a crumbly topping. It’s now a staple in our house, especially during the fall when apples are at their best.
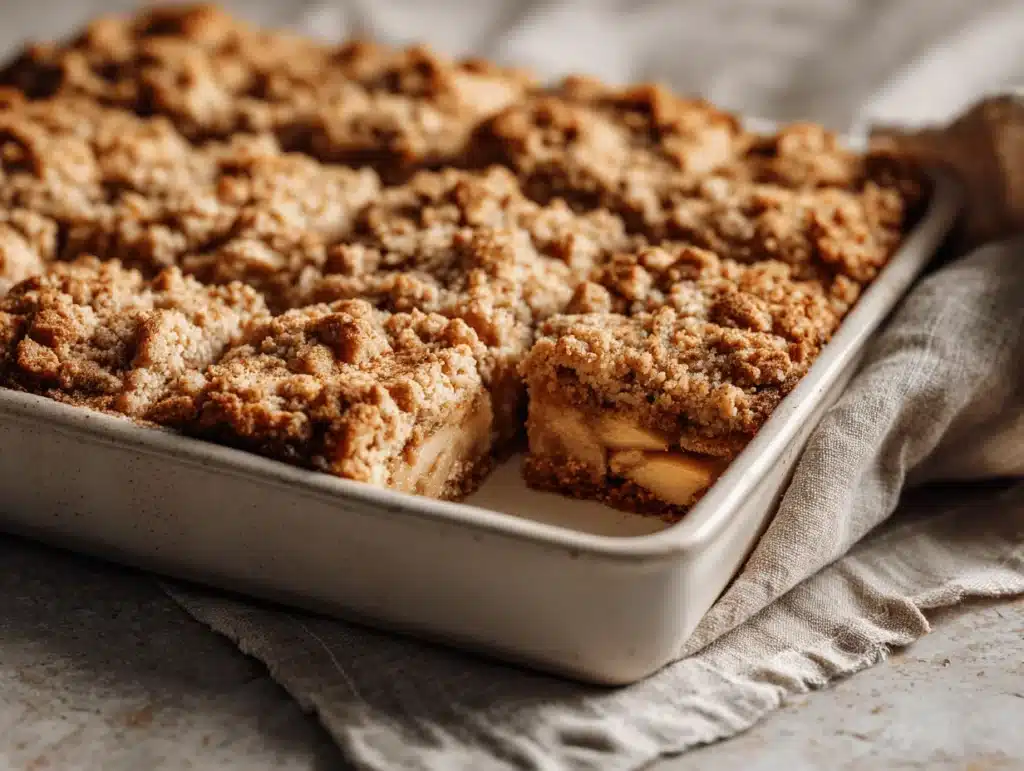
What makes these Easy Apple Pie Bars special is their perfect balance of texture—crisp on the edges, soft in the middle, and packed with juicy, cinnamon-spiced apples in every bite. Whether you’re prepping dessert for a crowd or just treating yourself, this recipe works for everyone. It’s comforting, easy to serve, and totally adaptable for different diets. If you love the flavors of classic apple pie but want something you can cut into tidy squares and share, you’re in the right place. I’ve tested these bars more times than I can count, tweaking the crust and filling until they were just right. Trust me, you’ll want to save this recipe for every apple season!
Why You’ll Love This Recipe
- Quick & Easy: These apple pie bars come together in under an hour—most of it hands-off baking time, so you can tidy up or sip coffee while your kitchen fills with fall aromas.
- Simple Ingredients: Nothing fancy here. You probably have everything you need already—flour, butter, sugar, apples, cinnamon. No special shopping trip required.
- Perfect for Any Occasion: These bars are ideal for potlucks, holiday gatherings, or a cozy weekend treat. They slice beautifully and travel well, making them a favorite for parties.
- Crowd-Pleaser: Every time I make these, everyone—from picky kids to dessert-loving adults—asks for the recipe. They’re the kind of treat that disappears fast!
- Unbelievably Delicious: Imagine the flavor of homemade apple pie—sweet, spiced, buttery—but in a portable bar you can eat with your hands. It’s comfort food, pure and simple.
I’ve baked these Easy Apple Pie Bars for years, and honestly, no two batches are ever exactly the same—sometimes I add a sprinkle of nutmeg, other times I use a mix of apple varieties for extra depth. The crust is sturdy but tender, the filling juicy and fragrant, and the topping provides just enough crunch. What sets my version apart is the double-bake method: part of the crust gets pre-baked, so it stays crisp and doesn’t get soggy under the apple filling (learned that one the hard way!).
I like to think of these bars as apple pie with a modern twist—less fuss, more flavor, and way easier to share. If you’re looking for a dessert that can impress guests but also satisfy your own late-night sweet tooth, this is it. Whether you serve them warm with ice cream or pack them in lunchboxes, these apple pie bars deliver every time. They’ve become a family tradition, and I bet they’ll become one in your home too.
Ingredients Needed
This recipe calls for simple, wholesome ingredients that come together for bold flavor and a satisfying, bakery-style texture. Most are pantry staples, and there’s plenty of room to swap or substitute if you need to.
- For the Crust & Crumble:
- 2 1/2 cups (315g) all-purpose flour (or gluten-free blend for GF option)
- 1 cup (225g) unsalted butter, cold and cubed (adds richness—use plant-based butter if needed)
- 1/2 cup (100g) granulated sugar
- 1/2 cup (100g) light brown sugar, packed
- 1/2 tsp salt
- 1 tsp ground cinnamon (for that classic apple pie flavor)
- For the Apple Filling:
- 5 medium apples (about 1 1/2 lbs / 680g), peeled, cored, and diced (Granny Smith for tartness; Honeycrisp or Fuji for sweetness)
- 2 tbsp (16g) all-purpose flour (helps thicken juices)
- 1/3 cup (67g) granulated sugar
- 1/4 cup (55g) light brown sugar
- 1 1/2 tsp ground cinnamon
- 1/4 tsp ground nutmeg (optional, adds warmth)
- 1/4 tsp salt
- 2 tsp fresh lemon juice (about half a lemon—prevents browning, brightens flavor)
- Optional Add-Ons:
- 1/2 cup (60g) chopped walnuts or pecans (for crunch)
- 1/4 cup (40g) dried cranberries or raisins (for a tart-sweet twist)
- Powdered sugar, for dusting
When picking apples, I like to use a combo—one tart, one sweet—for the best flavor. If you only have one type, don’t stress, it’ll still be delicious. For flour, I’ve swapped in Bob’s Red Mill gluten-free blend with great results. Use coconut sugar or date sugar if you want something less processed. Butter is key for flavor, but vegan alternatives work too. Just make sure it’s cold before mixing for the crispiest crust.
Seasonal tip: In summer, try peaches or pears in place of apples! You can toss in extra spices—cardamom or ginger—if you’re feeling adventurous. For nut-free bars, skip the nuts or use pumpkin seeds. This recipe is easy to customize and forgiving, so use what you have on hand.
Equipment Needed
- 9×13-inch (23x33cm) baking pan: The classic size for dessert bars. If you only have a smaller pan, reduce the recipe a bit—just watch baking time.
- Large mixing bowls: One for the crust/crumble, one for the apple filling. Glass or stainless steel both work.
- Pastry cutter or fork: For blending cold butter into the flour mixture. I’ve used my hands in a pinch—messy, but effective!
- Sharp knife and peeler: For prepping apples. A Y-peeler is my favorite for speed.
- Spatula and wooden spoon: For mixing and spreading layers evenly in the pan.
- Parchment paper: Optional, but makes lifting bars out super easy (and cleanup a breeze).
- Wire cooling rack: Helps cool the bars quickly so you don’t burn your tongue (been there, done that).
No fancy gadgets required! If you don’t have a pastry cutter, two knives work just fine for cutting in butter. For the baking pan, I’ve used glass, ceramic, and metal—metal gives slightly crisper edges, but any will do. When it comes to maintenance, keep your peeler sharp and wash mixing bowls right away to avoid sticky sugar residue. For budget-friendly picks, dollar-store spatulas and bowls have never let me down.
Preparation Method
- Prep the Pan: Line a 9×13-inch (23x33cm) baking pan with parchment paper, leaving some overhang. This makes it easier to lift out the bars later. Preheat your oven to 350°F (175°C).
- Mix the Crust & Crumble: In a large bowl, whisk together 2 1/2 cups (315g) flour, 1/2 cup (100g) granulated sugar, 1/2 cup (100g) brown sugar, 1/2 tsp salt, and 1 tsp cinnamon. Add 1 cup (225g) cold, cubed butter. Use a pastry cutter or fork to blend until the mixture resembles coarse crumbs. If it looks too dry, squeeze a handful—it should stick together lightly.
- Press the Crust: Take about 2/3 of the mixture and firmly press it into the bottom of your prepared pan. Aim for an even layer about 1/2 inch thick. Bake for 12-15 minutes, until just starting to set and lightly golden. This step helps prevent soggy bars.
- Prep the Apples: While the crust bakes, peel, core, and dice 5 medium apples (about 1 1/2 lbs / 680g). Toss apples in a bowl with 2 tbsp (16g) flour, 1/3 cup (67g) sugar, 1/4 cup (55g) brown sugar, 1 1/2 tsp cinnamon, 1/4 tsp nutmeg (if using), 1/4 tsp salt, and 2 tsp lemon juice. Stir until evenly coated—your kitchen will smell amazing at this point.
- Add Filling: Spread the apple mixture evenly over the baked crust. If using nuts or dried fruit, sprinkle them on now. Press down gently so the apples settle in.
- Top & Bake: Sprinkle the remaining crust/crumble mixture over the apples. I like to pinch some into larger clumps for a chunky, bakery-style crumb. Bake for 35-40 minutes, until the top is golden and the apples are bubbly. If you notice the topping browning too quickly, loosely tent with foil.
- Cool & Slice: Remove from oven and place pan on a wire rack. Let cool for at least 30 minutes—bars hold together much better if you wait. Use parchment overhang to lift bars out, then cut into squares. (If you try to slice while hot, they might fall apart—patience pays off!)
Personal Tips: If your apples release a lot of juice, don’t panic—the flour in the filling thickens it nicely. For extra-crispy bars, bake an additional 5 minutes. I’ve had batches where the crumb topping looked pale; a quick broil (1-2 minutes) fixes it, but watch closely! For efficiency, prep apples while crust is in the oven. If you want neat edges, use a serrated knife after full cooling. And if you’re in a rush, pop bars in the fridge for quicker setting.
Cooking Tips & Techniques
Here are some tried-and-true tricks I’ve learned after many apple pie bar adventures (some the hard way!):
- Don’t skip pre-baking the crust. It keeps the base firm and prevents sogginess. If you forget, the bars might fall apart—been there, not fun.
- Use cold butter for the crumble. Warm butter will melt too quickly and make the topping greasy instead of crumbly.
- Mix apple varieties. Combining tart and sweet apples creates a more complex flavor. I once used only Granny Smith, and the bars were a bit too tart for my kids.
- Layer evenly. Spread apples and crumble as evenly as possible for consistent baking. Uneven layers can lead to dry spots or undercooked apples.
- Watch your oven. Every oven is different! Start checking the bars around the 35-minute mark. The top should be golden, and you should see bubbling at the edges.
- Let them cool. Cutting the bars too soon is tempting, but they set and slice much cleaner if you wait. If you need them fast, chill in the fridge for 20 minutes.
I used to struggle with crumb topping getting too dark. Tenting foil over the pan halfway through baking solves that. Don’t overmix the crumble—big clumps are good! For multitasking, I always prep the apples while the crust bakes, so everything comes together quicker. If you want a more gooey filling, add an extra apple and a splash more lemon juice. Consistency is key: measure ingredients carefully, and don’t rush the cooling process. You’ll get perfect bars every time!
Variations & Adaptations
These Easy Apple Pie Bars are super flexible—here are some of my favorite tweaks:
- Gluten-Free: Swap all-purpose flour for your favorite gluten-free blend (I like Cup4Cup or Bob’s Red Mill). The bars stay crisp and delicious.
- Vegan: Use plant-based butter and make sure your sugar is vegan-friendly. The bars turn out just as buttery and satisfying.
- Nutty Crunch: Add chopped walnuts, pecans, or almonds to the crumble topping. I tried this last Thanksgiving—everyone loved the extra texture!
- Berry Boost: Toss in a handful of fresh or dried cranberries, raspberries, or blueberries with the apples for a tangy twist.
- Spice Swap: Try adding ground ginger, cardamom, or allspice to the filling for a unique flavor profile. Use whatever spices you love most.
- Dairy-Free: Substitute coconut oil for the butter. The crust will be a bit softer, but still tasty.
For different cooking methods, I’ve baked these bars in a toaster oven (for small batches)—just watch the time, as they can brown faster. If you want individual portions, use muffin tins for mini apple pie bites. To customize for taste preferences, adjust the sugar up or down, or add a splash of vanilla to the filling. For allergies, skip nuts or swap with seeds. My favorite personal variation? Adding a caramel drizzle before serving—total crowd-pleaser.
Serving & Storage Suggestions
I love serving these apple pie bars slightly warm, with a scoop of vanilla ice cream or a swirl of whipped cream on top. They’re beautiful on a rustic wooden board, dusted with powdered sugar for a bakery-style finish. Pair them with hot apple cider, coffee, or even chai tea for the ultimate fall treat.
For storage, place cooled bars in an airtight container. They’ll keep at room temperature for 2 days, or up to 5 days in the refrigerator. The flavors actually deepen after a night in the fridge—so they’re even better the next day! To freeze, wrap individual squares tightly and store for up to 2 months. Defrost overnight in the fridge, then warm in the oven (300°F/150°C for 10 minutes) or microwave for 20 seconds.
If reheating, use a low temp to avoid drying out the bars. I’ve found placing a damp paper towel over them in the microwave keeps them moist. Over time, the apple flavor gets richer and the crust a bit softer—still tasty! If you’re serving for brunch, cut into smaller squares for bite-sized treats. These bars are perfect for lunchboxes, snacks, or dessert trays—just watch them disappear!
Nutritional Information & Benefits
Here’s a quick look at what you’re getting in each apple pie bar (for a batch cut into 16 squares):
- Approx. 210 calories per bar
- 30g carbohydrates
- 3g fiber
- 3g protein
- 9g fat
Key benefits? Apples are loaded with vitamin C, fiber, and antioxidants. Cinnamon helps support healthy blood sugar. If you go light on sugar or use a gluten-free flour, these bars can fit a variety of diets. For nut allergies, just skip the nuts—easy! The recipe is naturally egg-free, and you can make it dairy-free with a butter substitute. From a wellness perspective, I love that it’s a treat made from real fruit and simple ingredients—no mystery additives. It’s dessert you can feel good about sharing!
Conclusion
Honestly, Easy Apple Pie Bars are the kind of recipe that makes fall baking feel totally doable—even if you’re short on time or energy. They’ve become a staple in my house because they’re simple, adaptable, and always delicious. If you love the taste of homemade apple pie but want something you can slice and share, these bars are absolutely worth trying.
Don’t be afraid to tweak the recipe—add nuts, swap in pears, boost the spices, or make it vegan or gluten-free. That’s the beauty of this dessert! I love these bars because they remind me of cozy afternoons, laughter around the kitchen table, and the simple joy of baking with fresh apples. If you give this recipe a go, let me know in the comments how you customized it or share a picture—seriously, I’d love to see your creations. Happy fall baking!
Frequently Asked Questions
Can I use store-bought apple pie filling instead of fresh apples?
Yes, you can! Use about 2 1/2 cups (600g) of pie filling. The bars will be a bit sweeter and softer, but still tasty. Just skip the sugar and spices in the filling step.
What’s the best apple variety for these bars?
I love using a mix of Granny Smith (for tartness) and Honeycrisp or Fuji (for sweetness). But any firm apple will work—use what you have!
Can I make these bars gluten-free?
Absolutely! Just swap the all-purpose flour for your favorite gluten-free blend. The bars will be slightly more crumbly, but still delicious.
How do I keep the crust from getting soggy?
Pre-baking the crust is key. Make sure to bake it for at least 12-15 minutes before adding the apples, and don’t skip the flour in the filling—it helps absorb excess juices.
Can I freeze apple pie bars?
Yes! Wrap individual bars in plastic or foil, then freeze for up to 2 months. Thaw overnight in the fridge and reheat gently before serving for best texture.
Pin This Recipe!
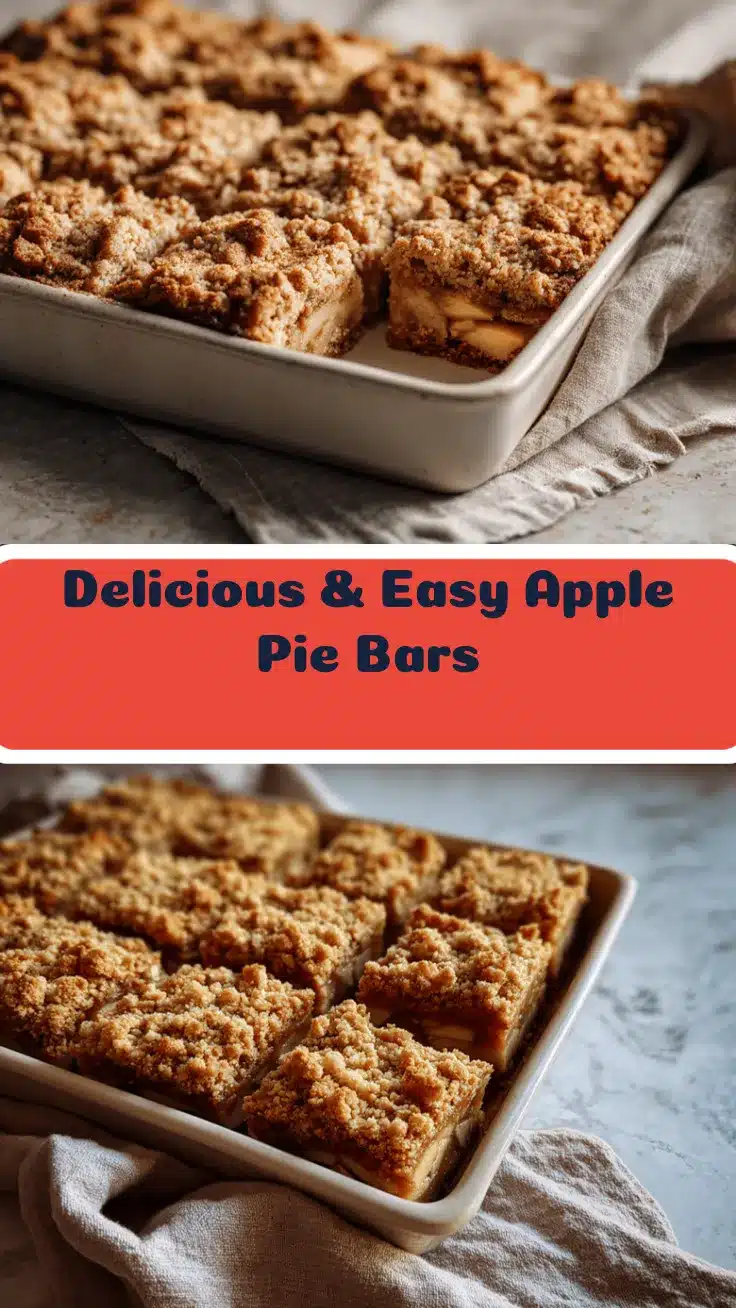
Easy Apple Pie Bars
- Total Time: 1 hour 10 minutes
- Yield: 16 bars 1x
Description
These Easy Apple Pie Bars are a cozy, crowd-pleasing dessert with a buttery crust, juicy cinnamon-spiced apple filling, and crumbly topping. Perfect for fall, they deliver classic apple pie flavor in a simple, shareable bar.
Ingredients
- 2 1/2 cups all-purpose flour (or gluten-free blend for GF option)
- 1 cup unsalted butter, cold and cubed
- 1/2 cup granulated sugar
- 1/2 cup light brown sugar, packed
- 1/2 tsp salt
- 1 tsp ground cinnamon
- 5 medium apples (about 1 1/2 lbs), peeled, cored, and diced (Granny Smith, Honeycrisp, or Fuji)
- 2 tbsp all-purpose flour
- 1/3 cup granulated sugar
- 1/4 cup light brown sugar
- 1 1/2 tsp ground cinnamon
- 1/4 tsp ground nutmeg (optional)
- 1/4 tsp salt
- 2 tsp fresh lemon juice
- 1/2 cup chopped walnuts or pecans (optional)
- 1/4 cup dried cranberries or raisins (optional)
- Powdered sugar, for dusting (optional)
Instructions
- Line a 9×13-inch baking pan with parchment paper, leaving some overhang. Preheat oven to 350°F (175°C).
- In a large bowl, whisk together 2 1/2 cups flour, 1/2 cup granulated sugar, 1/2 cup brown sugar, 1/2 tsp salt, and 1 tsp cinnamon. Add 1 cup cold, cubed butter and blend with a pastry cutter or fork until mixture resembles coarse crumbs.
- Press about 2/3 of the mixture firmly into the bottom of the prepared pan for an even layer about 1/2 inch thick. Bake for 12-15 minutes, until just set and lightly golden.
- While crust bakes, peel, core, and dice 5 medium apples. Toss apples in a bowl with 2 tbsp flour, 1/3 cup sugar, 1/4 cup brown sugar, 1 1/2 tsp cinnamon, 1/4 tsp nutmeg (if using), 1/4 tsp salt, and 2 tsp lemon juice. Stir until evenly coated.
- Spread apple mixture evenly over the baked crust. Sprinkle nuts or dried fruit on top if using. Press down gently.
- Sprinkle remaining crust/crumble mixture over apples, pinching some into larger clumps for a chunky crumb. Bake for 35-40 minutes, until top is golden and apples are bubbly. Tent with foil if topping browns too quickly.
- Remove from oven and cool in pan on a wire rack for at least 30 minutes. Use parchment overhang to lift bars out, then cut into squares.
Notes
For best results, use a mix of tart and sweet apples. Pre-bake the crust to prevent sogginess. Let bars cool fully before slicing for neat squares. Customize with nuts, dried fruit, or extra spices. For gluten-free or vegan, substitute flour and butter as needed. Bars freeze well for up to 2 months.
- Prep Time: 20 minutes
- Cook Time: 50 minutes
- Category: Dessert
- Cuisine: American
Nutrition
- Serving Size: 1 bar (1/16 of recipe)
- Calories: 210
- Sugar: 18
- Sodium: 90
- Fat: 9
- Saturated Fat: 5
- Carbohydrates: 30
- Fiber: 3
- Protein: 3
Keywords: apple pie bars, fall dessert, easy apple bars, homemade apple pie, apple squares, cinnamon apple bars, gluten-free apple bars, vegan apple bars, autumn baking